It is advisable to start with the basics of programming in the C language for AVR microcontrollers not by purchasing a controller and programmer, but by reading books and getting familiar with programming environments such as AVR Studio, CodeVisionAVR, or Flowcode V4 for AVRs. The most convenient way to begin learning microcontroller programming is by analyzing simple program examples, one of which can be found here.
Simple program for the Atmega2313 microcontroller:
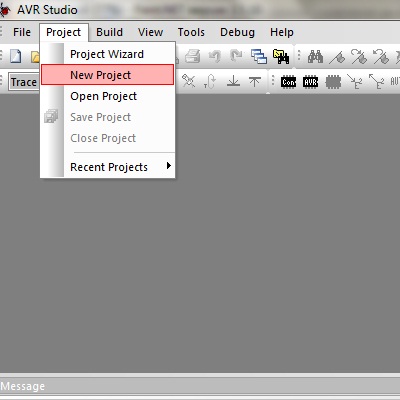
Many amateur radio enthusiasts begin learning the C language and AVR microcontrollers by working with the convenient and user-friendly programming environment called AVR Studio. It is easy to download and install, but it’s important to note that after installing AVR Studio, you also need to download and install WinAVR. Both software environments are freely available.
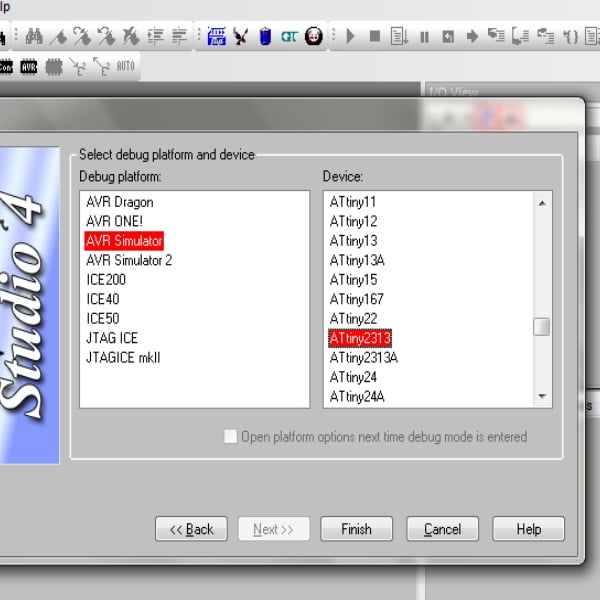
To begin with, it is important to learn how to properly create projects in AVR Studio using the C language. There are already plenty of books available for self-education where you can learn how to create a project in AVR Studio correctly.
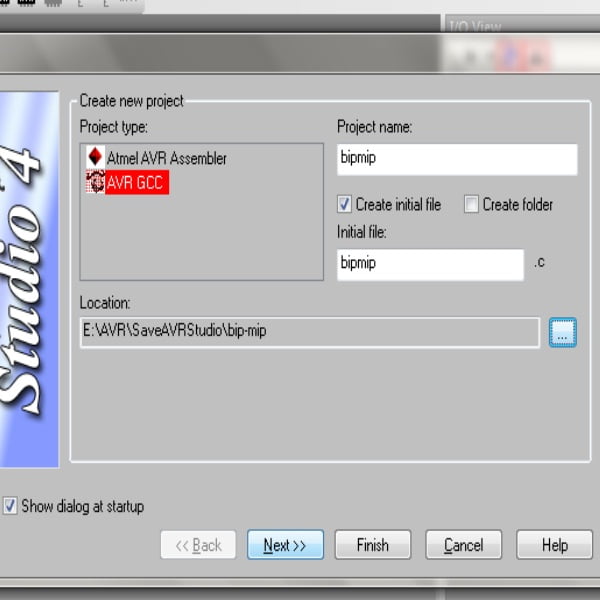
It is worth noting that the folder where you will save your projects and the path to it should not contain any Russian letters (only the English alphabet), otherwise it will not work.
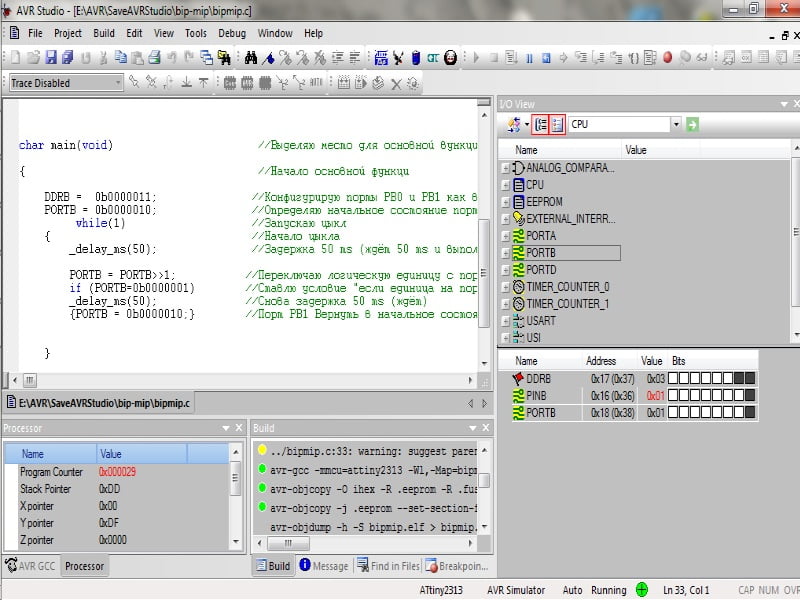
After successfully creating your project, you can start writing your program.
Listing of the program for the microcontroller:
Program listing refers to the text of the program itself, including comments.
//_____________________________________________________\\
//|             |                     |               |\\
//|    Deta     |  Microcontroller    |   Author      |\\
//|_____________|_____________________|_______________|\\
//|             |                     |               |\\
//| 08.11.2013  | Attyni2313 [4 МГЦ]  |  bip-mip.com  |\\
//|_____________|_____________________|_______________|\\
//|
//|Version 1.2
//|
//
/*||Two-LED Blinker ||
Alternately blinks two LEDs connected to port B0 and B1 of the Attiny2313 microcontroller */

        #include <avr/io.h>           // Include the I/O library
        #include <util/delay.h>       // Include the delay library

char main(void)                       //Allocate space for the main function of the program (program container)

{                                     //Start of the main function

    DDRB =  0b0000011;               //Configure ports B0 and B1 as outputs (1 - denotes output)
    PORTB = 0b0000010;               //Define the initial state of port B1 (logical high on the output)

         while(1)                    //Start the loop
    {                                //Start of the loop
        _delay_ms(50);               //Delay 50 ms (waits for 50 ms and performs the next action)

        PORTB = PORTB>>1;           //Переключаю логическую единицу с порта B1 на B0
        if (PORTB=0b0000001)        //Set condition 'if there is a logical high on port B1
        _delay_ms(50);              //Delay 50 ms again (waits)
        {PORTB = 0b0000010;}        //Return to the initial state

    }

    return 0;

}
Undoubtedly, if you are a beginner in microcontroller programming using the C language, you might not understand a single line in my listing. I strongly recommend that you get books and guides on programming, and don’t hesitate to read them — with time, everything will become clear!
It should be noted:
// or /*text */ combination — This signifies a comment, which provides explanations for the actions performed by the program (comments are meant for your understanding). For the compiler, comments are invisible — they simply don’t exist.
I create convenient templates or cheat sheets for myself from comments, which comes in handy especially when you are new to programming.
After entering the program listing in the designated window, you need to save it and compile it (press F7 for compilation).
To compile means to check the program for errors, both logical and grammatical. Even experienced programmers, not to mention novice radio enthusiasts, often make mistakes.
If you have entered the program listing correctly, there should be no errors, and you will see a green light. If not, be attentive, check for errors, and try to understand what went wrong.
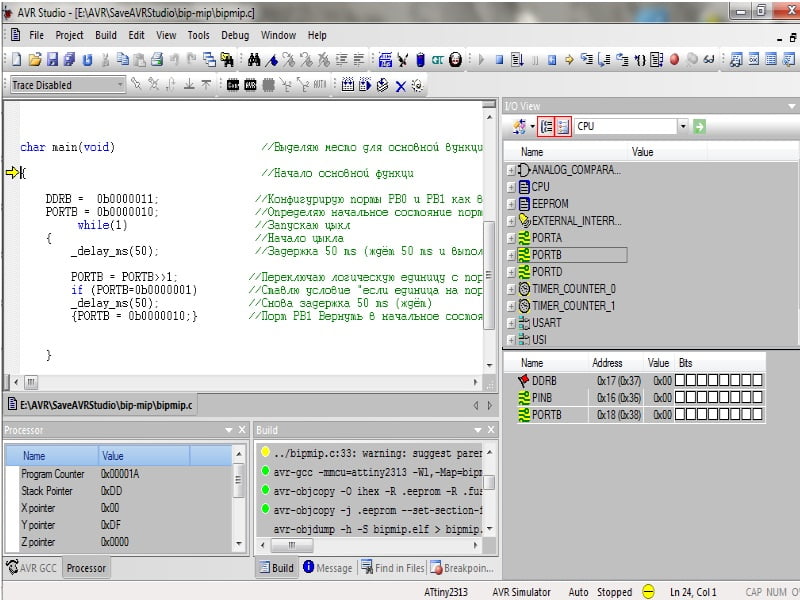
To check how the program works after compilation, simply press Shift+F5, and the program will show you what is happening.

P.S. I have tried to provide the most understandable and simple example of a basic program for the Attiny2313 microcontroller. I am not an experienced programmer, so I welcome constructive criticism and helpful advice. This program is by no means the only thing you can find on our website at https://bip-mip.com/.