Hello everyone!) This article on the topic does not claim to be nominated for the ‘DIY of the Year’ idea. It is simply information for reflection, aimed at adding a new, compact, and spacious organizer to your arsenal of handmade inventory.
DIY Paper or Cardboard Organizer:
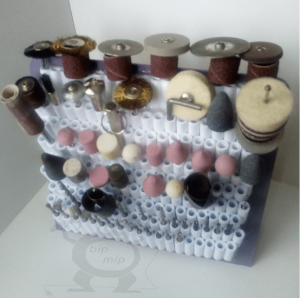
My idea, while not new, and perhaps most critics will say that it’s much easier to drill holes in a wooden block than to wind a hundred paper tubes, just take a look at the beauty that resulted (and it’s quite compact):
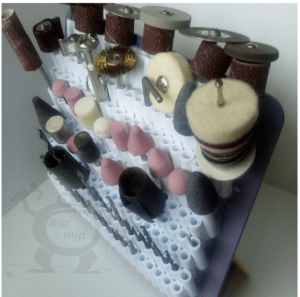
Of course, as seen in the photo, I used a plastic plate as the chassis, but that’s just because I had it available. Additionally, it’s worth mentioning that my idea allows for the organizer to be assembled (like a house made of bricks or LEGO) in virtually any configuration and size — round, square, rotating
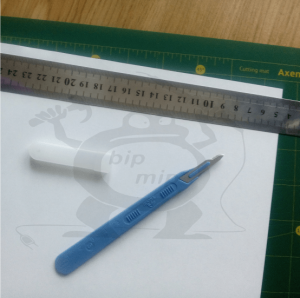
In order to replicate my construction of the stand for borers, chisels, drills, milling cutters, screwdrivers, colored pencils, or whatever else comes to your mind, you will need paper glue, paper itself, as well as various cutting tools, a ruler, and a cutting board for cardboard.
The principle here is very simple: stock up on paper, glue, time, and plenty of patience! I must say, it took me about two days to do all this, as it involved mindless, repetitive, mechanical work accompanied by my favorite music.
Cut a straight strip of paper, wrap it around a suitable diameter guide, and finally, glue the end with fast-drying glue to prevent it from unraveling.

I used plastic sticks from lollipops for my paper tubes, which significantly sped up the process. The great thing is that all the borers, attachments, and holders fit perfectly into the resulting openings.
Once you have an adequate number of slots/tubes, all that’s left is to assemble and join them together like a honeycomb. You can use glue for this step (I personally used hot glue as it is faster and more convenient, but I’m confident that regular white glue (PVA) would work as well).
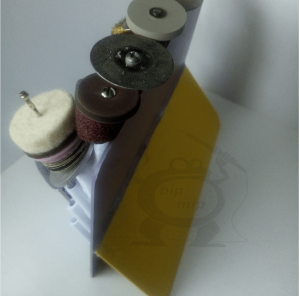
Since I used a trimmed, thin plastic board for sculpting clay as the supporting chassis, I attached a stopper on the backside using a plastic corner and a glue gun. This stopper prevents the structure from falling, but of course, it all depends on your needs and imagination.
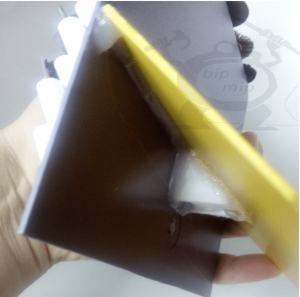
I coated the ends of the paper tubes with white glue (PVA), and after drying, they became secure and wouldn’t unwind or come apart easily, which suits me just fine.
By arranging my borers, engraving attachments, drills, and chisels in this way, it has become very convenient.
If we overlook certain details and despite the fact that it takes quite a long time to make, just think about the amount of useful potential this organizer has! You can place these slots even on curved surfaces, the materials used are cheap and readily available, and the main drawback is the time investment. However, for those who enjoy taking their time to create something, this DIY project is perfect! Relax and enjoy the process.