The essence of the idea for this article is no longer new. However, despite the variety of modern ready-made organizers, cassette holders, jars, and other boxes for storing electronic components, this particular idea can be suitable for both beginners and experienced electronics enthusiasts or beadwork artists, as well as scrapbooking enthusiasts.
The convenient cassette holder made from matchboxes has since become outdated and no longer relevant after that!
I want to clarify right away that I am expressing my opinion, starting with the phrase “it’s most convenient for me,” so this idea is subjective and may appeal to some while not to others.
And so!)) Typically, anyone involved in electronics ends up with a surplus of electronic components. Therefore, sooner or later, the question arises: “How to store all these small parts?!”
Convenient and organized storage of resistors, capacitors, and other small components of various values, especially in relatively small quantities (up to 100 pieces), is already half the enjoyment when it comes to soldering and circuit tuning.
It is also worth noting that beginner electronics enthusiasts are an interesting group of people who tend to gather all sorts of things into their workshops. However, when they need a specific component, they often end up buying it simply because they couldn’t find it in their stockpiles.
Order and systematic approach should be present everywhere and in everything, especially when it comes to dealing with electronic components and materials.
If this activity brings you income, then it’s worth investing in a convenient organizer. However, if you’re just starting out, here’s what I’ve discovered for myself and would like to share with you:
Convenient storage of resistors: DIY organizer:
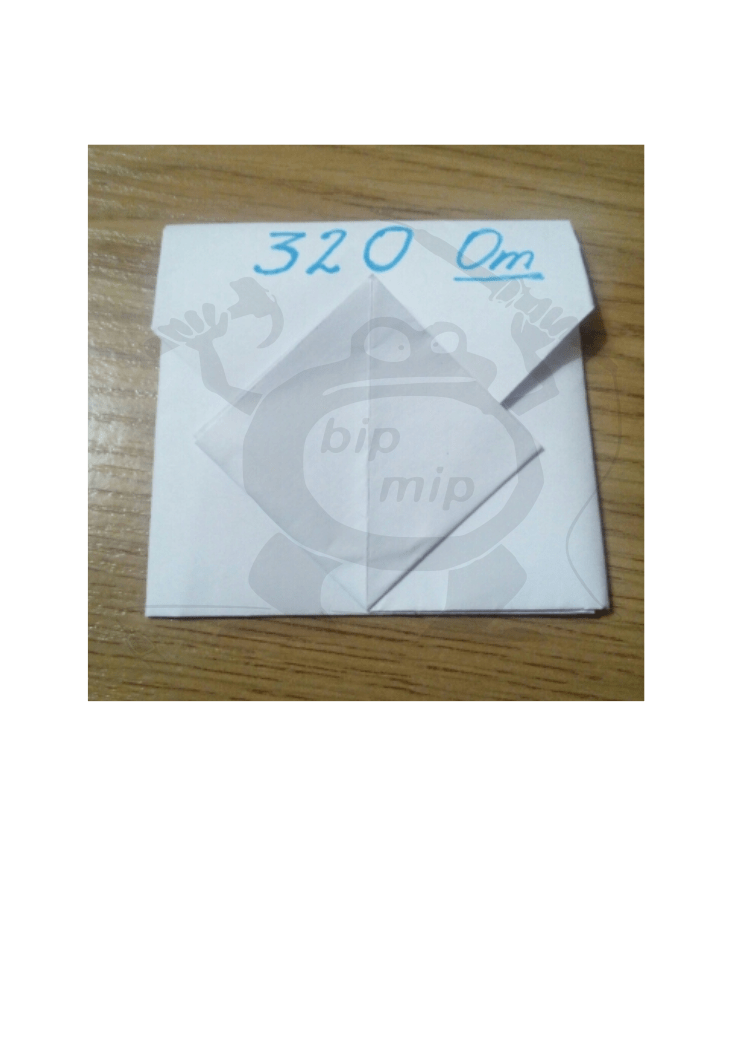
An organizer is typically a box with multiple compartments, preferably labeled. However, I was reluctant to spend money on buying one, so I came up with a solution: a cassette holder made from matchboxes that I glued together. But over time, it wore out, and that’s when I found a new solution! I came up with the idea of creating a file system using homemade paper envelopes!
I used this origami envelope as the foundation:

After obtaining such a paper envelope, which, by the way, can be made from used A4 sheets instead of, like me, using brand new, perfectly even, white, and neat sheets. (What can I say? — It’s wastefulness, but I can afford it).
So, all you have to do is take a handful of randomly piled electronic components in your hands. Take control of yourself and sort the necessary parts by their values. Folding them into the appropriate packets.


And now you can arrange them in order or send them to all your friends by mail)) Here’s another thing worth noting:
To make paper envelopes uniform in size, you can follow these steps:
To make my card index uniform, I came up with a clever trick. I simply cut out a rectangle from a piece of plastic (actually, I just happened to have a suitable-sized piece on hand).
I used this rectangle as a template for folding the main, ‘form-shaping’ lines of the envelope.


And there you have it, when you have a stack of paper envelopes ready…

I recommend gluing them with paper glue, preferably not PVA glue as it can make them too soggy. It’s better to use glue stick. A good glue stick, of course!)