In modern agrarian economy there are a lot of all kinds of tools that are designed to make life easier for dacha owners and amateur gardeners. In my opinion, a lawn mower like a lox trimmer is one of the very simple, and ingenious inventions, capable in a matter of minutes, to turn your overgrown weeded garden plot into a well-groomed lawn. But no matter how clever the invention is, it needs maintenance and repair. I am not a supporter of remodeling industrial tools, but in order to save money, I have invented and describe a useful addition to the lox trimmer.
Shoulder trimmer, repair with your own hands:
When you start a power tool in the household you should immediately realize that in addition to the electrical part, there is also a mechanical part, which requires timely maintenance, cleaning, cooling, and lubrication. An electric trimmer is not an exception. I will tell you a little about my trimmer, the model, and the parameters I do not specify — it is not so important. The first thing it covered was the button, when I took it apart, there were clear signs of melting, I think it was caused by voltage surges in the network and the processes occurring at the time of switching. To put it simply, it was of poor quality. Like many other parts of the trimmer, the button can be replaced by another, suitable for the parameters (current and design). The blade for the trimmer, well, as well as other attachments is a consumable item, and it is natural that it ran out and I have. As a typical kulibin, I began to pry there everything that came under the hand, starting from the usual thick fishing line and ending with a thicker and more durable special line for trimmers. In spite of my natural curiosity and inquisitiveness, I acted within the framework of the read instructions, but even this did not save my reel from destruction.
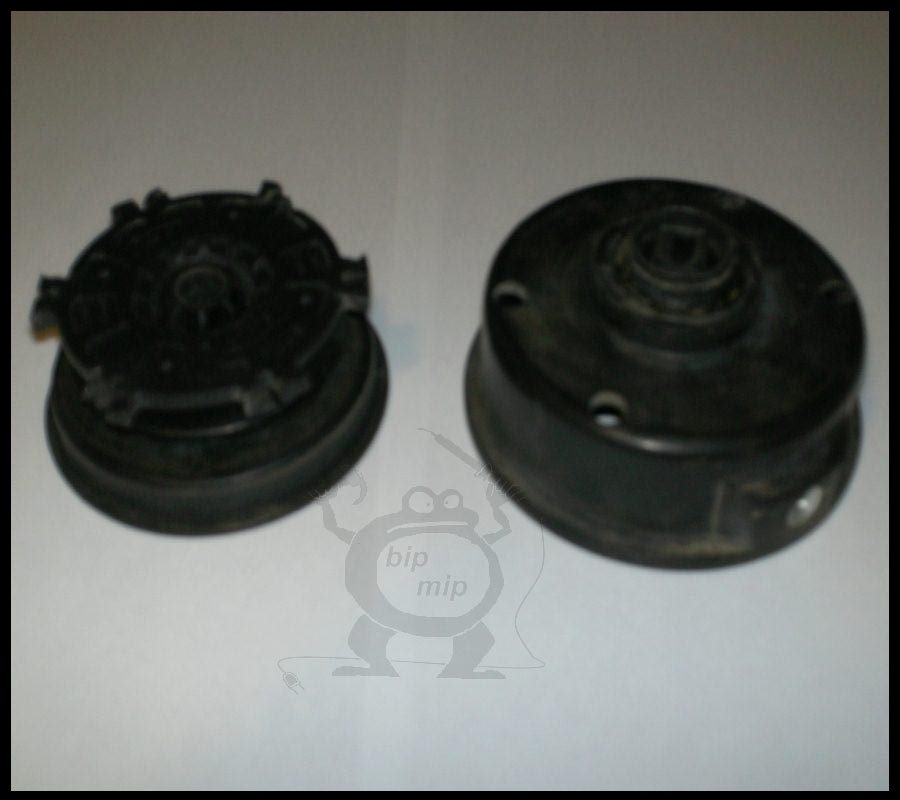
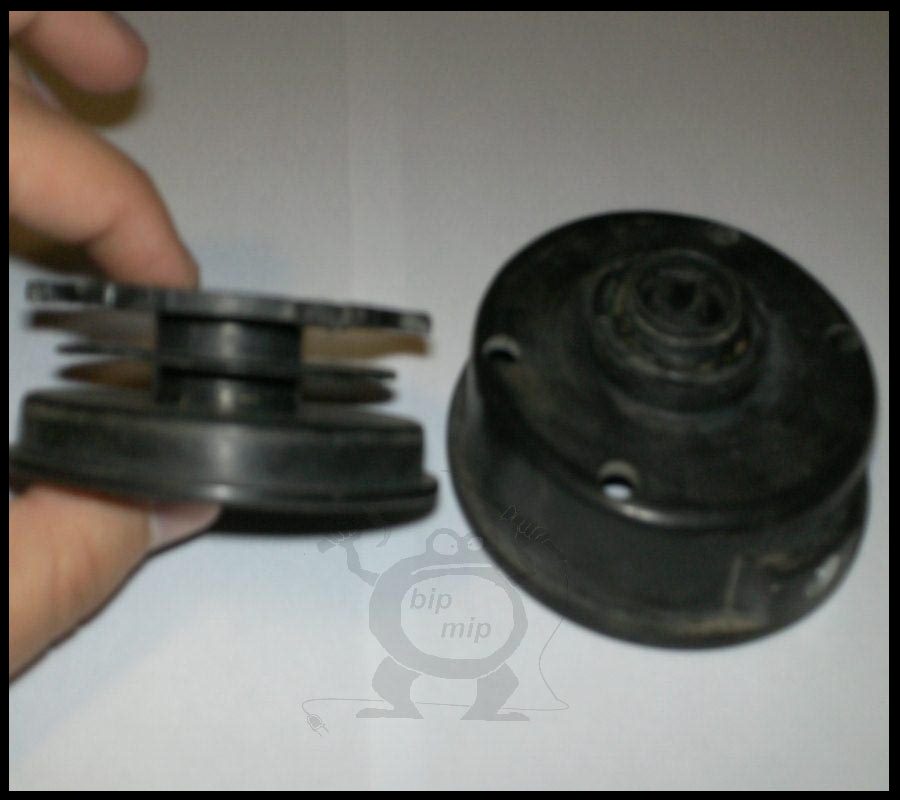
As if the spool (meaning the very part where the line is wound), is not very much affected in the process of my experiments, but the special grooves holding the line simply wear off, it is not surprising because they are plastic, and the trimmer I use for a long time and quite often. Of course, even older models of trimmers are sold spare parts, ranging from the fishing line and ending with the engine. But the new spool seemed to me a bit expensive, the price was “bite”, and I was not satisfied with the fact that you can not fill it with a 5 mm thick line (my trimmer is designed to use a 2 mm thick line).
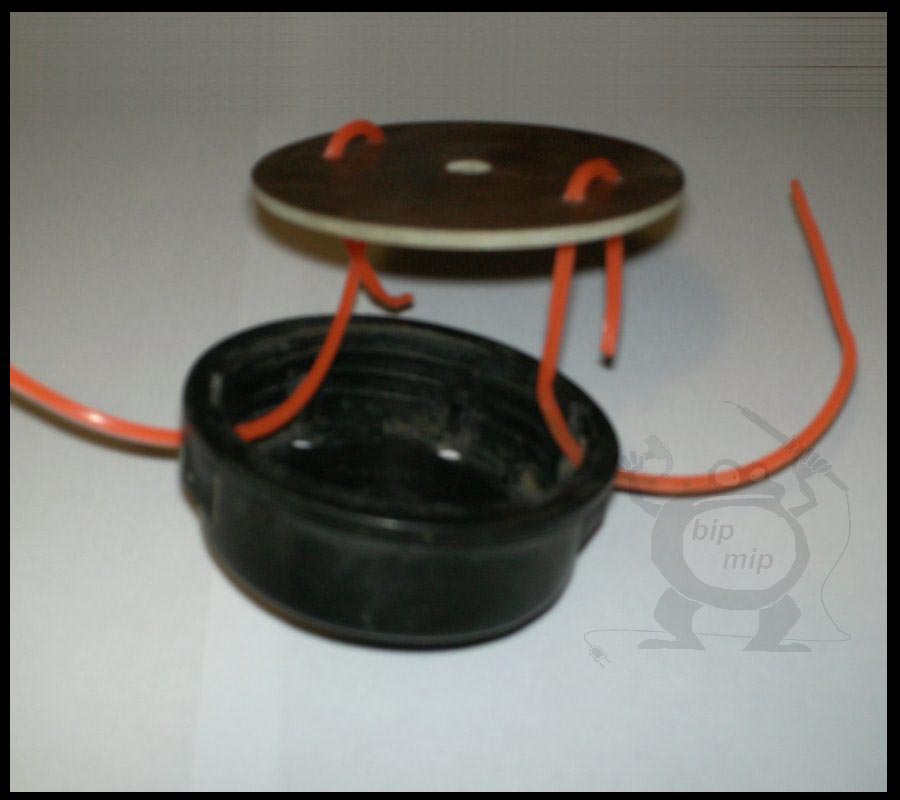
So… after much thought on the subject of how to refine the trimmer coil, I came up with an idea that is easy to implement and quite convenient to use. It is necessary to cut a circle from a strong material, I used foil textolite 4mm thick.
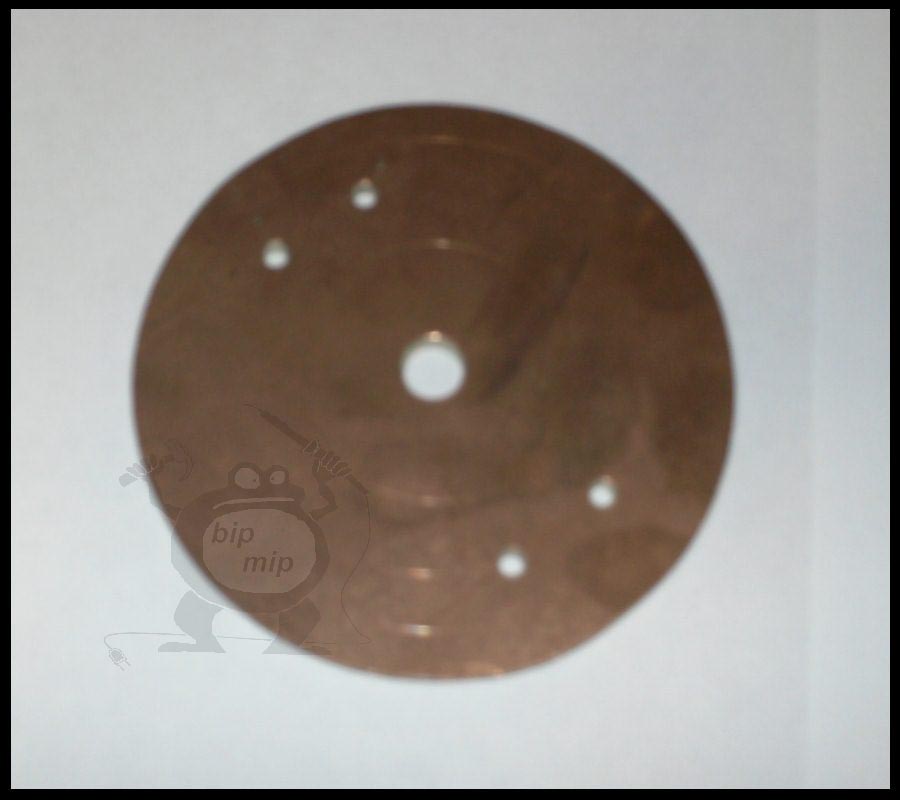
You need to make a hole in the center of the disk that matches the diameter of the axis of the rotating shaft, and four more holes (or even more) that match the diameter of your fishing line.
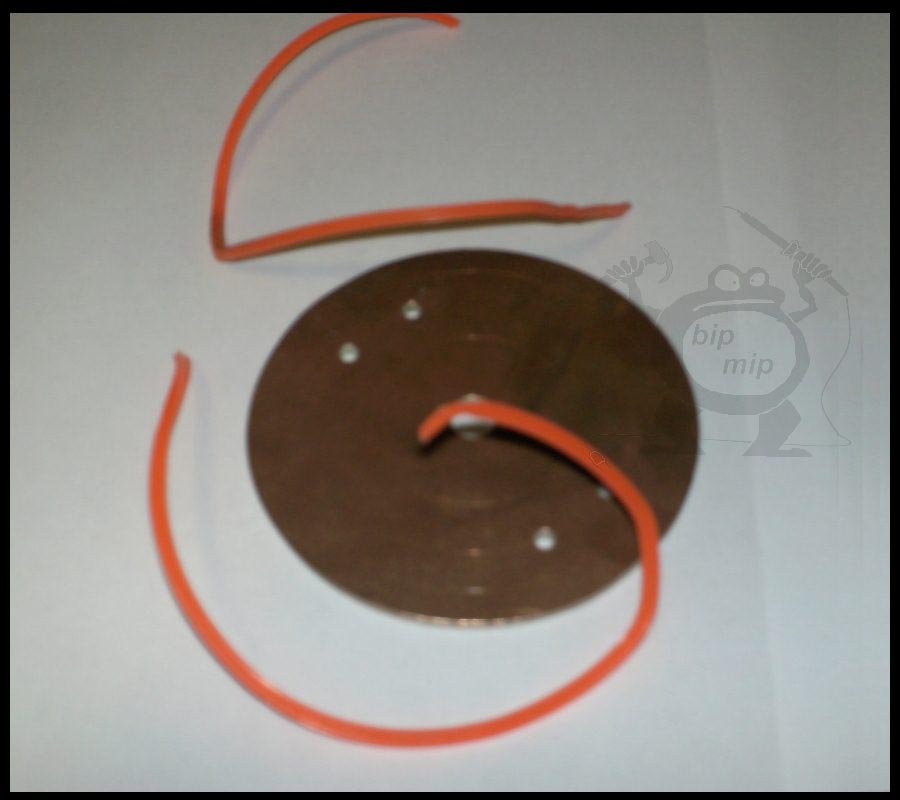
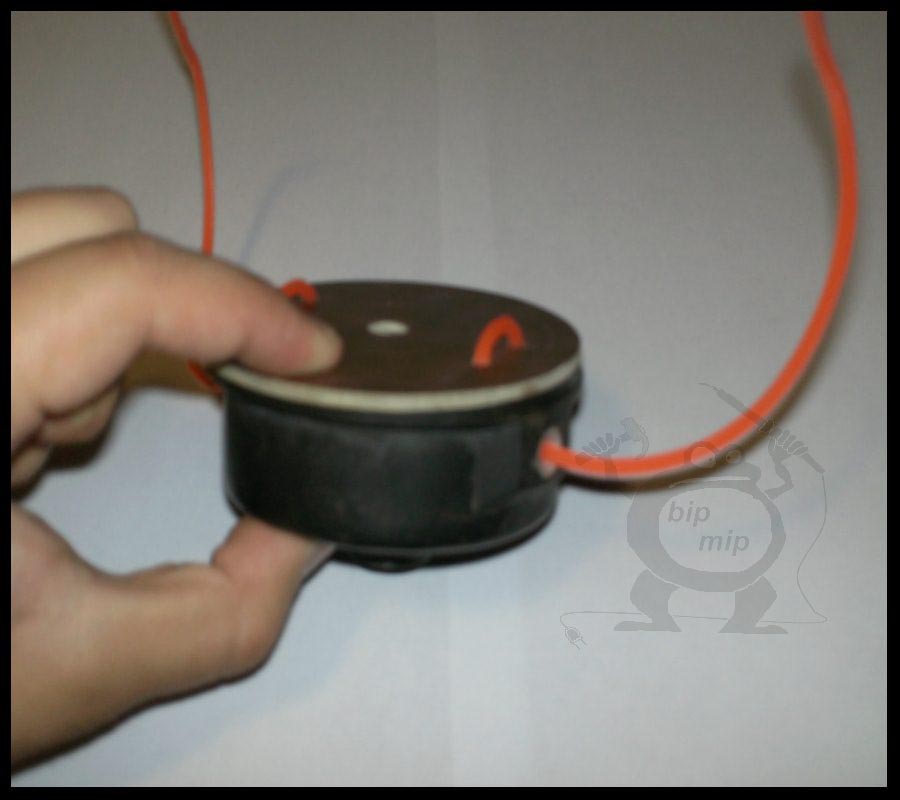
The idea is very simple, you do not use the spool, do not wind the line, and just tie it to the holes and attach the disk to the holder on the same principle as the old spool, it is only important to still find a suitable spring — for the reliability of attachment (who has a trimmer will immediately understand what the spring is about).

You don’t have to tie the line, despite the high revolutions, it holds quite firmly and doesn’t fly off. With the proposed organization of the direction of the fishing line in the trimmer, you win in the fact that you can hook the fishing line of any diameter and configuration, and you will never need to spend on new spools. But there are disadvantages, you will need to cut pieces of fishing line of a certain length, it may not always be convenient. But in terms of time and labor-intensive fishing line threading is not a bit worse than the classic method in the native spool.
I made a photo without trimmer and locking spring, as I was not at that moment at the countryside. But I can safely say that the result of my modification exceeded all my expectations. Now I have much reduced the cost of consumables for the trimmer, which once again proves the triumph of reason over the dogma of instructions attached to purchased tools.