Those who have decided to build something will greatly benefit from a couple of useful tips on foundation construction. It will be especially interesting to learn a folk trick for those who have a very limited budget, absolutely no knowledge of construction, and very little energy and time.
An easy way to pour a foundation for a simple structure:
It is important to note that by ‘simple structure,’ I mean something like a shed, chicken coop, balcony, or small summer kitchen. For larger, more complex constructions, I do not recommend using this method.
Here’s a method for pouring the foundation for a brick shed that I have personally tested and can vouch for. The shed is built with a single layer of bricks, and the foundation dimensions are 600×250 with a width of 30mm and a depth of 20mm. The shed is 250 units tall, has a wooden roof, and has been standing for 15 years without any cracks or issues. Based on this experience, I can confidently say that this method works.
How to pour the foundation correctly:
1) Clear and mark the site.
2) Dig a trench along the perimeter of the foundation, with a depth and dimensions suitable for the scale of your structure.
3)Next, you need to fill the foundation in layers in the following sequence:
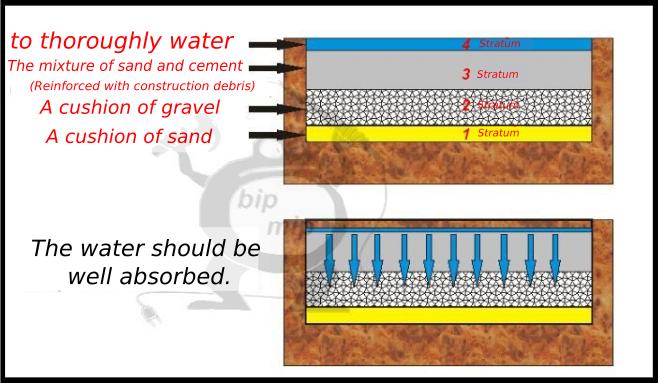
First, we fill a layer of sand evenly (I used about five centimeters), thus creating a cushion. Then, it is desirable to add an equal layer of gravel or crushed construction debris (as I did — I simply broke up whatever was at hand, such as glass bottles or old ceramic tiles). Next, another layer of sand is added, and right there in the trench, it is mixed with cement for easier and faster blending. Proportions are measured in buckets (I used three buckets of sand and one bucket of cement). You can also add gravel. Then, everything is leveled again and thoroughly soaked with water, ensuring that the water thoroughly penetrates the entire structure. The water should reach the very bottom sand cushion, so pour it generously. After that, it is best to forget about it for about twenty days, allowing the concrete to dry and acquire a grayish-blue shade. Then you can confidently proceed with the construction.
But if you need a truly reliable foundation or want to carry out any repair and construction work quickly and with high quality, it is better to consult professionals in the field of repair and construction.
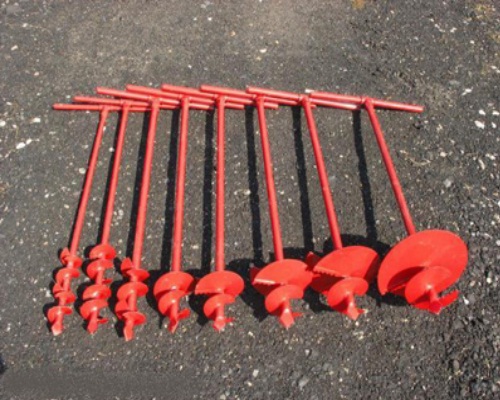
Do-it-yourself pile foundation:
But if you need to install your structure on a very uneven surface or reinforce certain parts of the foundation (these nuances arise when it is not possible to pour concrete evenly, for the purpose of reliable cost-saving or in areas where the soil is highly heterogeneous), a so-called pile foundation is used.

At first glance, it may seem adventurous, but sometimes piles are the only rational solution. The key is to calculate the load properly and use a threefold safety margin.
At first glance, it may seem adventurous, but sometimes piles are the only rational solution. The key is to calculate the load properly and use a threefold safety margin.
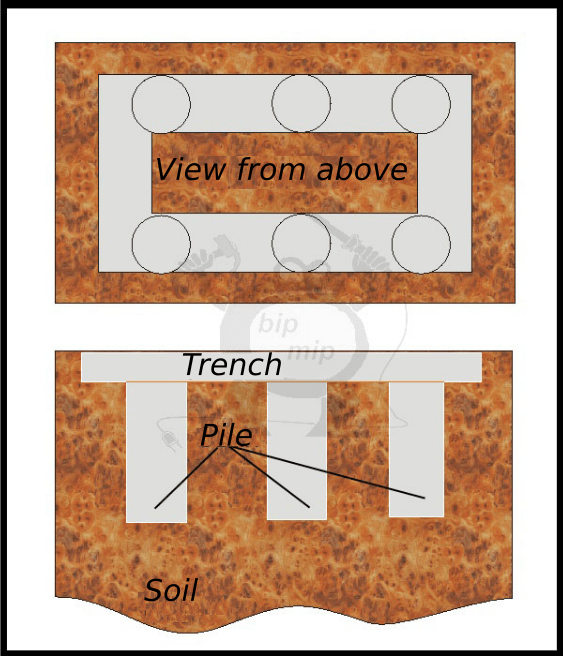
And then it’s all according to the classic method of pouring foundations. First, we lay the reinforcement, thereby interconnecting the entire structure and reinforcing it. Then we pour the concrete, preferably with gravel, compact it, and let it cure.

Thanks to this type of foundation, I built a 20-meter brick fence on uneven sandy soil. It has been standing for 10 years, and I have no complaints. The main advantage is that it was done quickly, cost-effectively, and efficiently.
Both types of foundations certainly have their pros and cons, and they are suitable for simple structures. Therefore, for anything more significant, it is advisable to call upon professionals.