Is it really possible or not? In this epistolary piece of art, I will try to free you from doubts and guide you towards action. Such information will be useful for those who have decided not to overpay, have nothing to lose, or want to delve into the details. However, it will be most beneficial for those who have decided to repair their laptop battery by themselves. Perhaps… I can dissuade you or, on the contrary, inspire you!? 😉
How to Disassemble a Laptop Battery by Yourself:
First and foremost, it is essential to understand that delving into the internals of a laptop battery should only be done as a last resort after exploring all other alternative options. For instance, if you have checked for power supply transistor failures on the laptop’s motherboard or, more logically, verified if the issue is related to a software glitch. It’s possible that your computer simply experienced a temporary glitch or a driver malfunction…
Secondly, you will not only need to watch all the YouTube videos on how to carefully disassemble the battery of your specific laptop but also create a special tool for yourself, such as a flat, thin, and sturdy spatula (a regular utility knife is not suitable as it can break, and a screwdriver may damage or deform the battery, making it undesirable to handle, let alone insert back into your beloved laptop).

Thus, having such a tool at hand, whether you acquire it or make it yourself from something like a broken old kitchen knife, a sharpened coin, or a flexible steel strip… in short, you are strong and resourceful — you can handle it! In other words, you will eventually manage to get it, as you don’t always need someone else to do the thinking for you!))) With the help of this little shovel, you will need to pry open the side clasps of the battery…
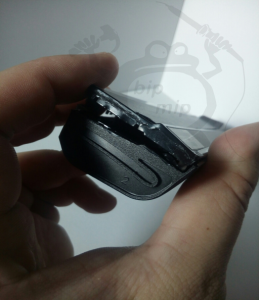
And then, once the side clasps are opened, by inserting a long, flat object (but not sharp) inside and with a bold yet careful hand movement, we open the shell and extract the pearl.
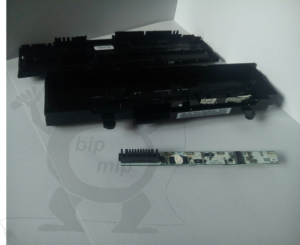
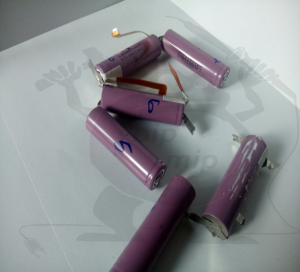
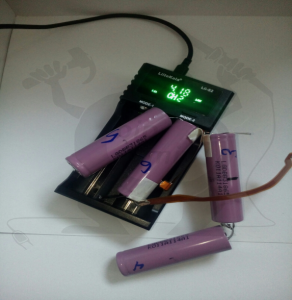
Of course, those who carefully read such information for not the first time will ask, ‘But where are the batteries!?'” “Show us the whole process in detail.’ Well, there’s nothing to show here; it’s all intuitive and self-explanatory. But here are the batteries if anyone needs them:
However, to understand what you will encounter when you open the battery, let me provide you with a typical connection diagram of the batteries to the BMS (Battery Management System) controller in your laptop and explain the principle of generating the required power levels for the laptop from them.
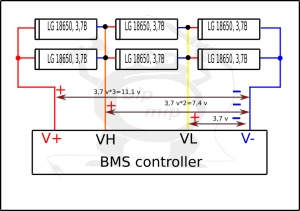
As seen in the diagram, the 18650 batteries are divided into pairs and connected… each pair within a block is connected in parallel, while the blocks themselves are connected in series. This arrangement allows for obtaining the necessary voltage levels and also enables individual monitoring of the charge of each section. By the way, typically, there is a temperature sensor attached to one of the sections—be careful not to damage it, as it will still be useful when you install new batteries!))
The idea is to desolder the batteries from the BMS controller, disconnecting them where necessary. If possible, it’s advisable not to forcefully detach everything completely. That’s how you can recharge them:
And here is where the most interesting part begins, the real challenge has arrived! While the idea of fixing the battery seemed quite straightforward, the implementation turned out to have many hidden obstacles.
During my highly intellectual experiments (by the term ‘highly intellectual,’ the author means behaving like a monkey with a grenade— poking around without knowing where to go), I realized that it wasn’t about a clever programmatically controlled fuse…
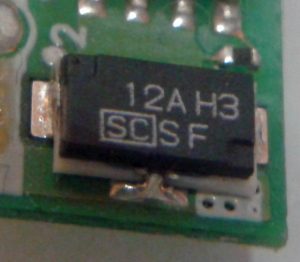
It turned out that the problem was actually caused by a more sophisticated battery charge controller, which stored all sorts of nasty things in its memory and knew ‘what you did last summer’))) And if you’re an unlucky person like me, don’t even attempt to reset the EEPROM (Electrically Erasable Programmable Read-Only Memory) with your golden hands on your own.
Based on my own experience, I can say that it’s not worth playing with fire in this situation. I’m referring to the situation where you’re not the most skilled programmer and don’t have a programmer device. Moreover, even if you have a program that helped everyone else and it doesn’t install properly on your computer because you’re running Linux and it’s not the most stable.
So, here’s what helped me turn my computer into a somewhat ‘tolerable-portable’ device: I heeded the advice of a wise man who simply connected the remaining working batteries directly to the battery connector, bypassing the troublesome battery charge controller… Et voilà! Now I can work for about forty minutes without relying on the power adapter and once again feel like an advanced user. Although in the process, you only vaguely realize what you’ve done and how to proceed from there!
CONCLUSION: ‘Don’t bother with trivialities, enjoy life! Just buy yourself a new battery, and if you really want to do something, make yourself a power bank from used batteries. There’s no need to insult your beloved old laptop by subjecting it to such cruel and dangerous experiments!!! Wishing you good luck, and I hope I’ve enlightened you!’